Homemade Mayo (Instructions, Review & more!)

A while back a friend of a friend posted on Instagram and FB about making her own Mayo in order to make an Avacado dressing. I was instantly intrigued. I've never made anything like that... and was curious about what was involved. Recently I decided to try it to work on one of my resolutions and actually make the mayo myself! (remember a post about all of them will be up sometime near the end of January/beginning of February)! So, here's the video I used to make my very own Olive Oil Mayo at home: 

[youtube]http://www.youtube.com/watch?v=RcKRj4E7m6M[/youtube]

And here are a few pictures of the process:

MakingMayo

It was actually pretty simple and took me around 10 minutes (after the egg and lemon juice got to room temp for about an hour). The thing I did find interesting was how warm the mayo was when I scraped it into the container. I guess that makes sense considering the friction involved in this process & the fact that it started out at room-temp, but I wasn't expecting it. :)

Soon after I made the mayo I realized that I could just use the "dirty blender" to go ahead and make the "Dreamy Avocado Dressing". Since I obtained the recipe for that directly from the friend of a friend I will post it here for you:

Dreamy Avocado Dressing

• 1/2 large avocado • 1 tbsp lime juice • 1/4 cup olive oil mayo • 1 small garlic clove • 1 tbsp fresh cilantro (optional) • 2 tbsp water (optional -- I used it, but use or omit it depending on desired thickness) • salt and pepper to taste

Directions: Place all ingredients into blender and or food processor and puree to desired consistency. Add water 1 tbsp at a time if necessary. Refrigerate 30 minutes before serving.  Store covered in the fridge! Like the Mayo the egg's expiration date is your dressing expiration date. :)

FINAL REVIEW:

I like both the mayo and the avocado dressing. I especially love the dressing for eating cut veggies. It's a healthy-er version of a regular dressing. I think both the mayo and dressing are better after sitting in the frig for a while. It helps add a bit of depth of flavor for all the ingredients to "mellow" together. Also, I didn't use fresh cilantro for the dressing (only because I didn't have any). I used some dry cilantro  but I *know* it would be better with fresh herbs. I'll try it again with fresh and update once I do!

If you try these recipes please let me know what you think and if you discover any new or interesting ways to update them!

Enjoy!

-Emily

Healthy Snacks: Balls and more balls!

At the end of January I plan on posting my resolutions for 2013 along with info about how I'm doing with each of them.... One of my resolutions involves cooking and another involves my pinterest. I'm hinting because I can't wait to share about this past weekend of cooking! On Saturday Jimmy, Skylar and I headed to a Whole Foods for the first time:

2e019cb65d0011e2abce22000a1f96d4_7

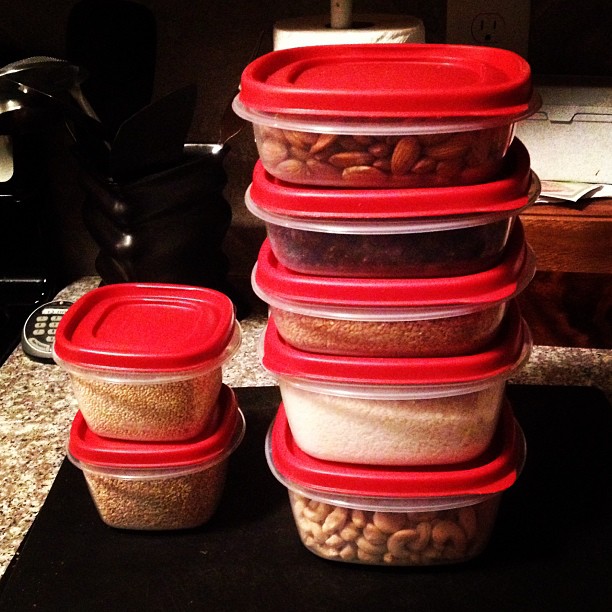
Talk about food-mecca! It was incredible in there! It took Jimmy & I a while to get our bearings, but we were able to get some amazing food! I also was able to purchase a ton of raw ingredients I planned to use for making healthy (but tasty) snacks:

Ingredients

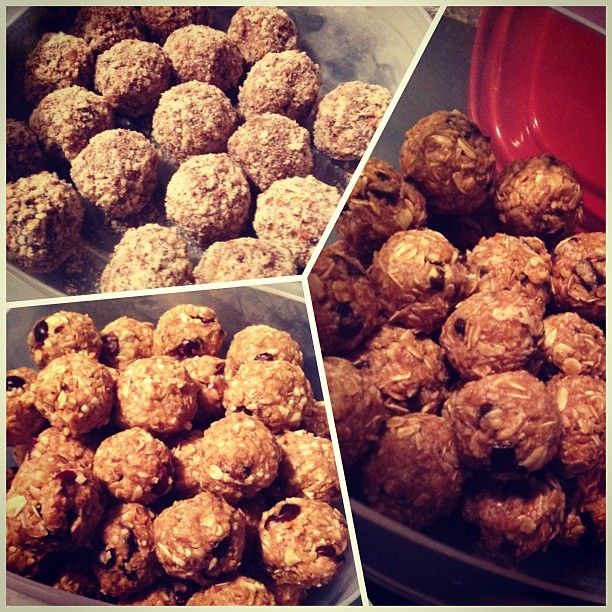
On Sunday after making a ridiculously bad for us (but super yummy) breakfast of french toast, bacon & fried eggs I settled into making snacks for the upcoming week! I made three types of "balls" (apparently that's the form many "snack foods" come in -- who knew?) and here's a picture of all three:

ballz

Now for the reviews! First the top left: Clean-Eating Cookie Dough (click for the recipe). These are the ones I was the most excited about and are probably my least favorite. Not only do they take the most work, but the recipe yielded the fewest "balls". I do like them -- just not as much as I had hoped. I may make them again and tweak the ingredients some to come up with something I like better. I will say that probably only about half of the almonds called for are needed to "coat" the balls. So, "food process" a 1/4 cup instead of half a cup.

Moving on to the bottom left type of "ball":  Power Truffles. I like these. They are actually similar to the next recipe, but with more actual nuts in them. Because of that I will likely make these again and will play with the types of nuts I use. This time I used cashews, almonds and walnuts. I would like to see what this is like with other nut combos. I also would probably add a few more cranberries and possibly raisins and a bit less sweetener (I used 3 T of honey). Overall, though, these are pretty satisfying.

Finally, my favorites (saving the best for last) on the right in the above picture: No-Bake Energy Bites. These are my "go to" snack balls at the moment. They are yummy and there's something about the oat texture in these that just reminds me of oatmeal cookie dough (with chocolate chips). I think if I made these with raisins I would enjoy them as well and they would truly be "oatmeal cookie dough bites". I may try that next. Or maybe I'll make half the batch with chocolate chips and half with raisins. Either way, these are awesome.

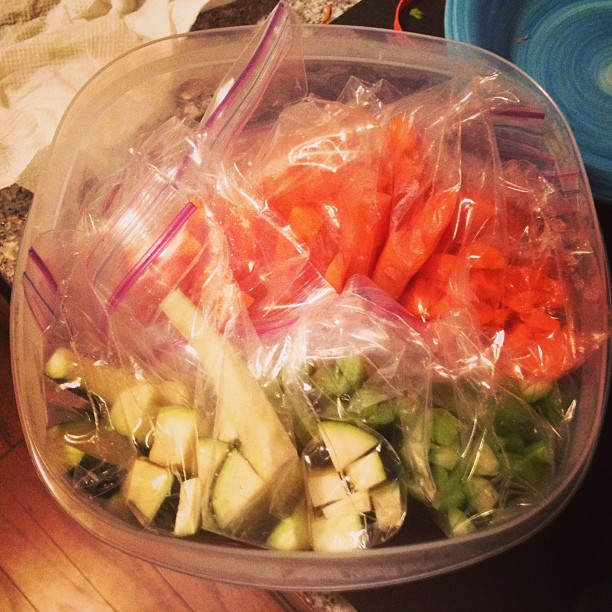
Along with these snacks I also cut up a bunch of veggies and separated them out into baggies for "easy snacking". Here's what I ended up with:

Veggies (Carrots, Zucchini, & Celery)

There ya have it friends! Here's me dipping my toe into the "healthy snack" arena. I will be experimenting with this a lot more in the coming year and I can't wait!

Love & Kisses,

Emily

PS: Last night I made home-made olive oil mayo and an avocado dressing out of the mayo. I'll write up a post about that in the next day or so -- after I try it with my veggies! :)